Showing posts with label DIY. Show all posts

Tuesday, 19 February 2013

The Blog Posts That Got Away

"Our life is frittered away by detail...simplify, simplify." - Henry David Thoreau

Recently my mind has been awash with creative intentions. Sometimes I wish I could switch my design mind off and just look at a piece of fabric and see a nice composition of colours, a vintage sheet and see an out dated piece of linen, a collection of jars and see a collection of jars, an old book and see a book. But these items just have a way of setting my design mind adrift and the compulsion to create and upcycle sets in. I can barely take breath between the waves of inspiration that seem to crash one on top of another and I end up lost in this ocean of intended projects. Recently I have been craving the solid, grounding feeling that comes from simply completing something.

Take this blog for example. In my mind I have written dozens of blog posts since I last actually posted.

There was the one about the joys of creating and receiving home made gifts.

Such as these cushions I made for my Mum for Christmas using iron on transfers and applique...


And my delight upon receiving these curtains she had made me in return...


There was the blog post about how to make your own luggage tags...


There was the 'How To Applique' blog post.


There was the posters I made blog post...


There was the hanging pictures and washi tape (read cheap electrical tape) hack blog post.


There was the post describing the vulnerability of trying to sell your hobby creations, there was the blog post outlining my new system for meal planning involving fun names to add structure to the week (Mince meat Monday, Tight Tuesday, Wok on Wednesday, Three Veg Thursday, Free-grain Friday, Stock up Saturday, Sort it out Sunday), there was the blog post about opportunity shopping, when I thought "she'll be right" and ended up with poo smeared all down the front of my white top, there was the blog post about how to turn a Little Golden Book into a decorative banner...

But have I written any of these blog posts? No. Rather than blogging I have been watching Munchkin Features learn to walk, saving her life a couple of times a week, launching my Facebook business, making new local friends, wiping sticky fingers, battling to get out the door on time, beginning to run a play group, learning how to share a car with Justice Boy (did I mention battling to get out the door on time?), op shopping, putting my name down for relief teaching at the local high school, and beginning a whole raft of creative projects.

Too many projects. Too many almost completed projects. And the problem with almost completed projects is that they kind of haunt me until they are done. And there are enough unfinished things around here to make my studio a pretty scary old room.

One solution might be to give up on the blogging and just focus on finishing things. The problem is I actually kind of love writing. So much so that when I got the opportunity this morning to drop off the Munchkin with her Babushka I thought I want to go to a cafe and WRITE! So here I am sitting in a cafĂ© and I am writing. And I am sitting. And I am writing. And I am still sitting. And I haven't been interrupted. And I am still sitting. And I am still writing. And I have still not been interrupted. There is a certain joy at the simplicity of just doing this one thing at the one time rather than attempt to talk on the phone, pick up toys, find food for the child, and do pelvic floor exercises all at the same time.

And now I am going to sit here and do this...


I plan to blog again next Tuesday but hope to squeeze in another post on the above earrings before then. I couldn't stop myself making a whole bunch of these they are so simple.

Is there a blog post from the list of potential blog posts you would like to read?


Wednesday, 23 January 2013

The ripple effect living room restyle

Ok, so I know I said I was going to organise my office/craft room, but organisation tends to be a bit like a pebble dropped in a pond, it causes ripples to flow out from the point of impact. Organising one area tends to show up another which now looks positively squalid in comparison. Organising one area often leads to reclaimed space which may cry out for a piece of furniture or other items currently located elsewhere, which then in turn create new spaces that need your attention. Or, as was the case for me in the previous few days, organising one area requires the rehousing of certain items elsewhere. For me it was books.

The office/craft room (hmm, if you've got any catchy room name suggestions let me know) currently houses the majority of our books owing to the fact that Munchkin Features like to read, a lot. One of her favourite past times is pulling books of the shelves, reading them, and discarding them. Book, read, discard. Book, read, discard. So the process goes on until the shelf is almost bare and standing to pull more books off the shelf requires balancing on a rug of abandoned pages that have a way of slipping out from underneath you. Ergo the only books in the living room are her board books.

But if I am to effectively organise my craft I will need to reclaim some shelf space in the room, which is why some books had to go. My solution was to build a bookshelf in the living room from bits and pieces of furniture we had already. I LOVE this kind of redecorating. New look, new feel, new purpose without spending any money! I am so happy with how it turned out.
It started with this inspiration from pinterest:

Better Homes and Gardens

and this...

This is one of those images floating around pinterest and doesn't link to anything

I had a coffee table who's only current function was to hide the power cords and display a pot plant.
I had a old bench collected in council clean up years ago who's only current function was to have a hidden wasps nest underneath it...found that one out along the way!
I had an old crate I got for a few dollars at a garage sale years ago before I knew crates were trendy who's only function was for display
I had a little cheap pine IKEA bookcase/bedside table who's only current function was as a place for future organisation of craft or office supplies.   

Really all I did was pile them up and then add my books! I got my interior decorator on by laying a few books flat, grouping some similar colours and sizes together, adding a plant and a few ornaments and boom, bookcase! Maybe one day I'll paint and distress the new IKEA shelf, but for now I'm more than content.


Unfortunately Munchkin Features thought it looked pretty good for climbing, her newest skill, so I had to move the suitcases she's sitting on (they do look a lot like stairs I guess). However, because of the depth of the coffee table her access to the books is somewhat restricted. She has had one go in the last few days, but nothing in comparison to letting her loose on a regular bookcase. Oh I realise I did buy something new, that little wooden plane I found for $2 at Vinnies. Ornament for me or toy for Munchy...only time will tell. 

Anyway, after I built the bookcase on one side I felt like the room needed some balancing out in height. So I brought in a ladder from outside (it came from the same garage sale as the crate) to add height and use as a magazine rack. Saw one of these once in a funky cafe on Derby St in Newcastle and mentally filed it away...see not all my ideas come from Pinterest!


I really love the new height and warmth and texture to the wall created by the rustic touches.

And while I was in the organising mode I decided to tackle our collection of technological items. Munchkin Features has a way of sniffing out all things technological and I am forever fishing my phone out from behind cushions on the lounge where it has been stashed out of sight, or confiscating the tablet that was left with reach on one of the coffee tables. I saw this toolbox conversion and thought it was one of the best ideas I'd seen in a looooong time.

Better Homes and Garden
And thus my new crate found its purpose (I knew I would find a worthwhile use for it!). 


It simultaneously organises and hides the cords as well as creating a safe place to leave technological bits and pieces.

And with tangent No. 1 completed I have resumed organisation of the office/craft room. Today I wound all my bias binding and elastic and ric-rac and other trims around pieces of cardboard and put them in a shoe box while Munchkin pulled as many books as she could off the freshly organised bookcase in the office, reinforcing my belief that I need to organise me a child free space!

What about you? Do you find organisation has a ripple effect? Or do you have any nifty solutions for organising the charging of your technology? 


Thursday, 17 January 2013

DIY Post Box Toy

I don't need to read parenting books to work out Munchkin Features has reached the age where she loves 'posting' things, all I have to do is open my mouth while she's eating and see her delight when she pops a grape or blueberry or pre-masticated piece of cheese on toast in my trap. 

For a while I've been meaning to create a shape sorter posting toy using a box and our blocks, mostly because all the shape sorters at the op shops are missing too many shapes. I very rarely buy new-in-their-box toys, come to think of it, I think I have only bought her three new toys since she was born: Sophie the Giraffe, a 'teaching clock' and set of blocks in a trolley. Even though she is a well-designed toy, the giraffe was probably was me succumbing to kiddy consumerism; all the babies have a 'Sophie' and you begin to feel a little odd without one. The clock and blocks are both nice wooden Pintoy toys I got on Brands Exclusive when she was still too young to play with toys. Again they are lovely, durable toys with good play longevity (the 8 year old nephew quite liked playing with the clock and the blocks too) BUT I think I was probably suckered in by the sale. I love seeing my child react to new toys as much as any parent, but I prefer to source them from op shops, garage sales, council clean ups and the odd gift from friends or family. (I'm sure ebay, gumtree and freecycle would be great too!)

Anyway looking at the boxes I had available I couldn't help but notice that the handle holes looked like little post box flaps and so I had some fun creating this little letter box!


A few days later and Munchkin Features is still happily entertained a few times a day by her post box!


Here's how to make your own. Great for ages 1+ as once they've mastered posting, they can then move on to imaginative play. Or what about writing letters to your littlie as they are learning to read so they can discover them in the morning, or when they get home from school?


You will need:
  • 1 study box, preferably with handle holes.
  • masking tape
  • stanley knife/box cutter
  • a roll of wrapping paper
  • a roll of clear contact
  • sharpie
  • something to decorate your box with like alphabet paper
  • old pill boxes that fit through the hole
  • brown craft paper


  • Step 1: Using the picture as a guide mark an ark on each end of the box around the handle, and along the sides of the box from the bottom of the ark at each end. (Mine is a bulk buy nappy wipes box)


Step 2: Cut out the section of the box you have marked above the ark on each end. (leave the sides)

Step 3: Fold the cardboard along the lines you've drawn on the side of the box so that the meet the ark, overlapping in the middle at the top. Use masking tape to keep it in place..I used quite a bit.


Step 4: Cut a flap...my box had a ready made guide.

Step 5: Cover the middle of the box in wrapping, some nice fire engine red would be great! I only han polkadots so that's what I used! I jazzed it up by spelling out 'POST' with alphabet wrapping paper. I also think it'd look great with a red base and jazzed up with vintage postcards and air mail envelopes! I then covered it with clear contact. You could always just use contact. 

Step 6: Trace end shape onto wrapping and mark and cut out handles and flap. Cover ends with paper and contact. (Because my contact was old and not too sticky I added some clear tape to the edges to improve the seal)


Oops, ran out of wrapping...better make a 'feature side'


Step 7: Using the off-cuts of cardboard, and some paracetamol boxes wrapped in craft paper, I drew up some letters and parcels addressed to various Playschool, nursery rhyme, and children's song characters. I love having fun with this stuff, for example:

Mr Grey Elephant
One Balancing Place
String City
1234 


And voila. A post box posting toy that I created from things I had lying around!

And I think Munchkin enjoys it as much as I enjoyed making it for her!

Wednesday, 16 January 2013

Peg Board and Peg Magnets


I mentioned that it was a bumper birthday month in my family. My sister-in-law had her birthday on the 13th and seeing as she is about to get a new kitchen I thought I might try my hand at making some magnets and a notice board/photo board. 

I picked the frame up for the board at the Lismore car boot markets one rainy Sunday recently. Great things about the car boot market:
  • They are on twice a month (1st and 3rd Sunday)
  • They are in an undercover car park so they aren't affected by the weather
  • There's plenty to look at from plants, bric a brac, second hand clothing and furniture and local handicrafts
I would say that the prices are very reasonable but then this would sound like an ad and not a review. But seriously if you are ever in the area...

Once the frame was done (I just cut chicken wire to size and then Justice Boy nailed it in on the back) I needed to get some wooden pegs that she could use to pin her pictures. At Hot Dollar I found a pack of 96 wooden pegs, plus a jumbo craft peg and self adhesive magnet sheets.


 I used scrapbook paper on the jumbo peg and washi tape (I knew I'd find a use for it) on the regular pegs. Cut the paper/tape to size and glue/stick in place on one side of the peg, and cut magnet sheet to size and stick to other side of the peg. Quick and easy with a big impact...gotta love that kind of craft! In an ideal world I would seal them with some modge podge but I didn't have any so they might not be as durable, I've made some for myself too so I'll see how they fare. 

I had some fun packaging them up to look pretty. I'm going with the name Ric-rac & Retro for my facebook shop...still yet to be launched...and I was having a play around with this circular tag. I like it, but I'm not sure how practical a circle is, so I was up late last night making another rectangular one.

If you are not a craftster you can still make these magnetic pegs and they make great gifts. Otherwise, I'm going to get my hands on some modge podge and make up a whole bunch for gifts and to sell...I have a stash of pretty paper that needs working through!


Thursday, 10 January 2013

Getting back on the horse...well donkey actually

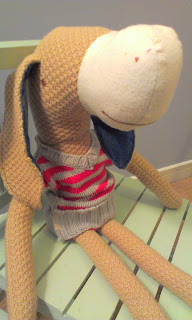
Well today was a good day.  I made some more party decorations, rendezvoused with Justice Boy at the park for lunch, hit up a few op shops, organised a birthday present for my nephew (January is bumper to bumper birthdays in our family), finished Gordon the donkey and Iished Munchkin Feature's party dress!

First up are these hot air balloons for our Somewhere Over the Rainbow party. They came together so quickly. Just cut four hot air balloon shapes, fold each in half (right sides together) and then glue the wrong sides together. If you had double sided paper you would only need two shapes and then you could just sew up the middle then fold them out. I'm going to hang these over the table

 Next up is my gift for my nephew, whose birthday is three days after Munchkin's. He loves cooking so I went loking or a nice big jar I could use to create a cookie kit for him. The Helicopter Rescue Op Shop in Ballina was my starting point and it didn't fail to deliver, two lovely big jars and two great board books for my Munchkin, which she proceeded to read aloud while I browsed. I also ducked into the kids store and found a great book full of ideas for drawing, designing and creative play. I think it will make a great gift because my nephew is an only child. To complete his gift I put together a 'Pet Rock' kit with some rocks, google eys, pom poms and pipe cleaners. All he needs is some glue! Here's how his present turned out...


It wasn't until I'd left the op shops that I remembered I was meant to be looking for a jumper for Gordon. But I also had a brainwave and also remembered a little striped baby vest I'd got at the op shop while I was pregnant. Munchkin wore it a couple of times but it was one of those things that always seemed too hot or too cold, so when I got home I dug it out of the "too small" clothes and Gordon got some clothes.


When Munchkin Features woke after a long nap she was in a great mood. Both of these things meant that I actually got to complete her party dress. I think I'll call it the Fairy Bread dress. I'm so happy with the way it turned out. It's my own vintage inspired pattern. The stroke of genius was making the tie back rather than buttons (got the idea from Can Can Sew's vintage romper). My machine has no button hole setting so buttons just seem to hold up everything. Anyway, here's my model.


 Yay for productive days!